Filtering Users and Saved Filters 🔖
The Users page lets you search, filter and sort your team, then save that combination as a named saved filter. Saved filters are shared with everyone in your business, so a filter set up once (e.g. "New starters" or "Overdue onboarding") is available to the whole team.
The users list
Each row shows the user's Name, Position, Role, Status, the date they were added (Created at) and their Progress through their workflows and certifications. The count on the right of the filter bar shows how many users match.
Status is one of:
- Uninvited - added to the business but not sent an invite yet
- Invited - sent an invite that hasn't been accepted yet
- Invite accepted - has accepted their invite and can log in
- Archived - archived from the business
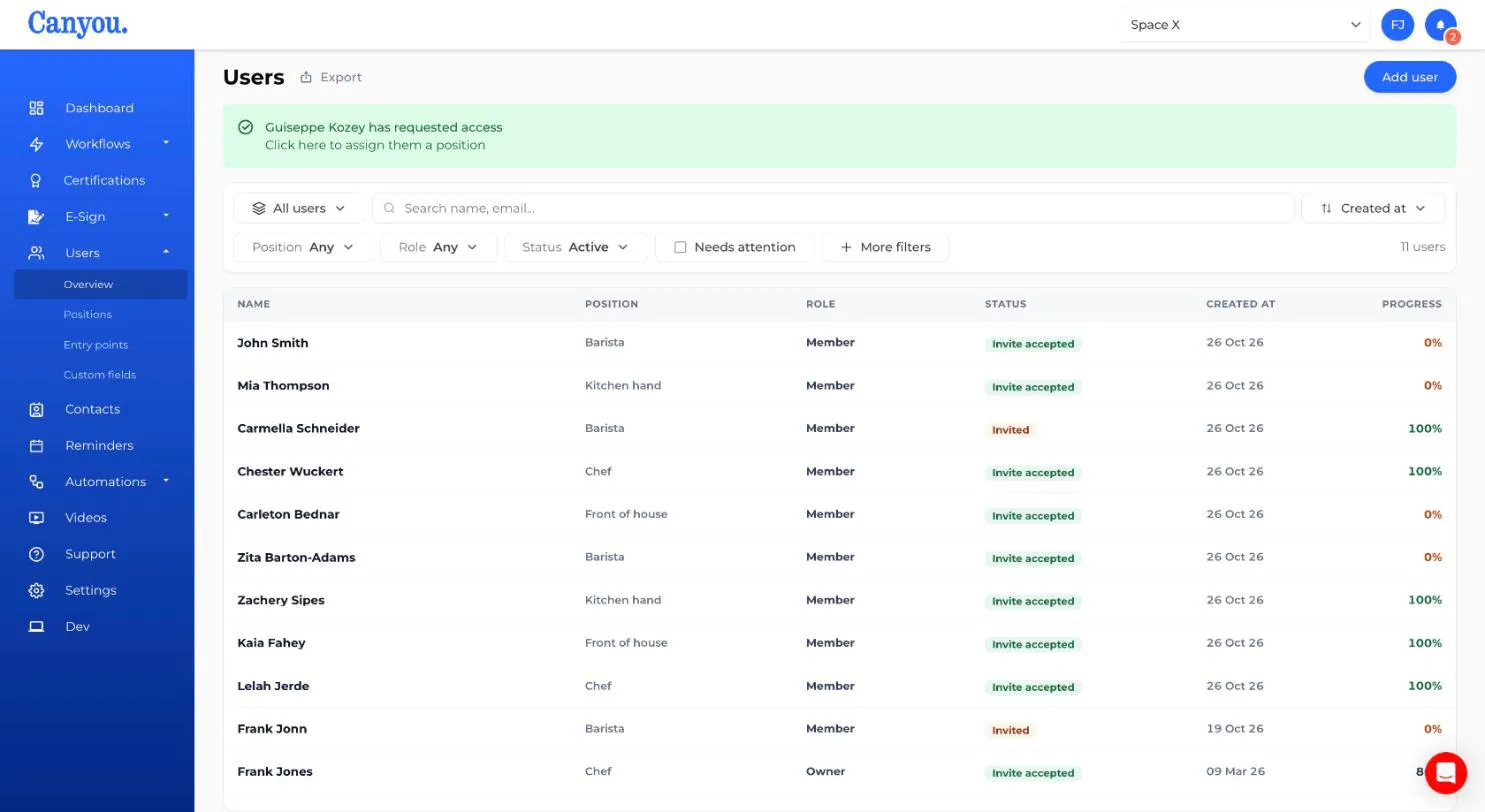
Search and filter
- Search - type part of a user's name or email.
- Position, Role and Status - always shown in the filter bar. Pick one or more values from each.
- Needs attention - tick this to show only users who haven't reached 100% progress.
Archived users are hidden by default. To see them, open the Status filter and choose Archived.
More filters
Click More filters to filter on anything else:
- Added by - the admin who added the user, or System for users who joined another way, such as through an entry point or an import.
- Created at - when the user was added.
- Archived at - when the user was archived. Pick a date range (e.g. everyone archived in September), or choose Is set to show only archived users or Is not set to show only users who haven't been archived.
- Birthday - the date of birth on each user's profile. It's a built-in custom field, so admins can switch it off as a filter. Learn about built-in fields
- Any custom field that's been set up as a filter. Learn how to make a custom field filterable
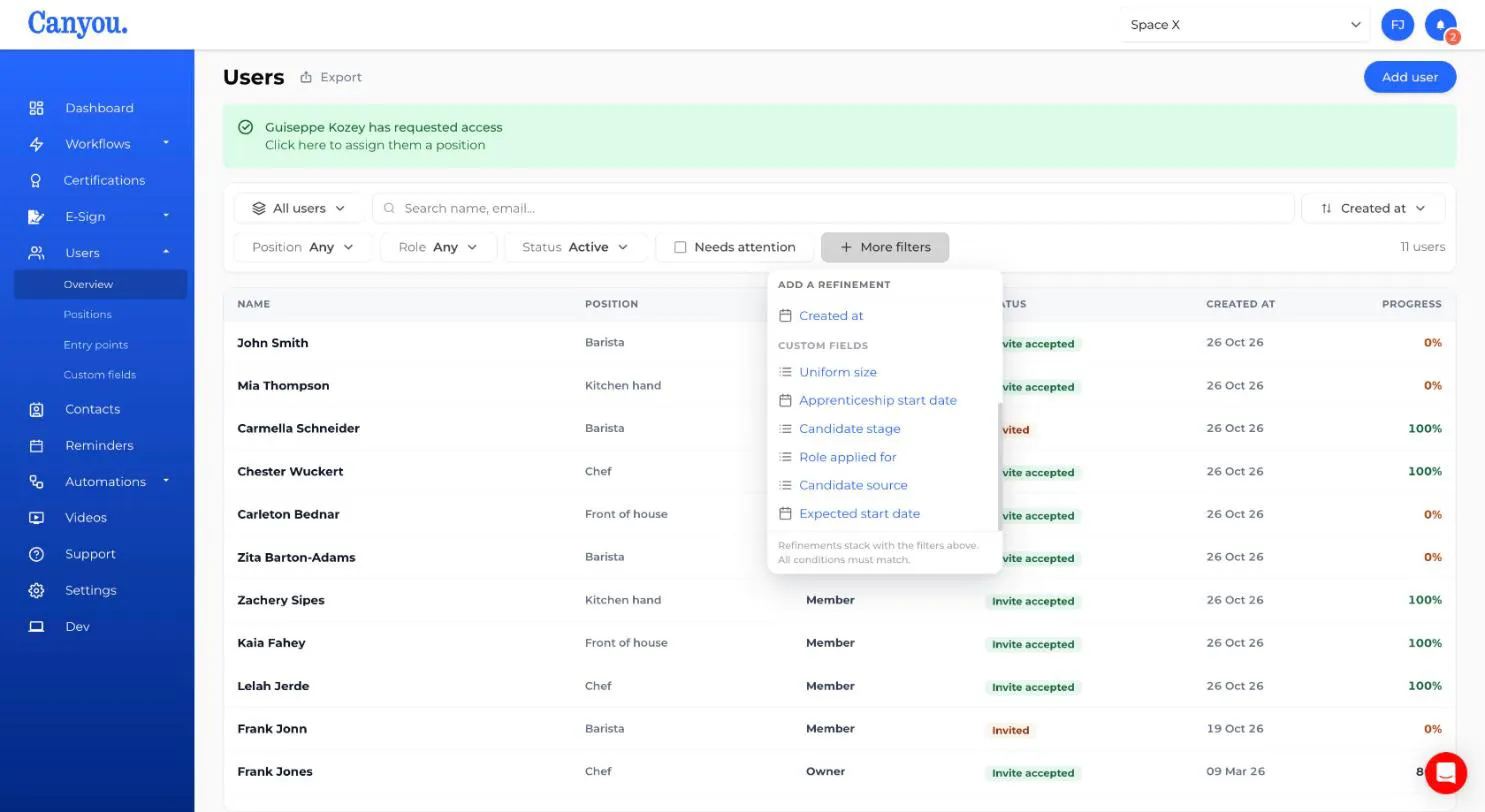
Each filter you add shows as a chip in the filter bar. Click the chip to change it, or the × to remove it. A user has to match every filter to show in the list.
How you filter depends on the type of field:
- Text - contains, is, is not, is empty or is not empty
- Choices - is (or is any of), is not (or is none of), is empty or is not empty
- Number - equal to, greater than, at least, less than, at most, between, is empty or is not empty
- Yes/No - is yes, is no, is empty or is not empty
- Dates and dates with times - pick a range, or choose Today, Last 7 days, Last 30 days, This month, Last month or This year. Is set and Is not set find users with or without a date.
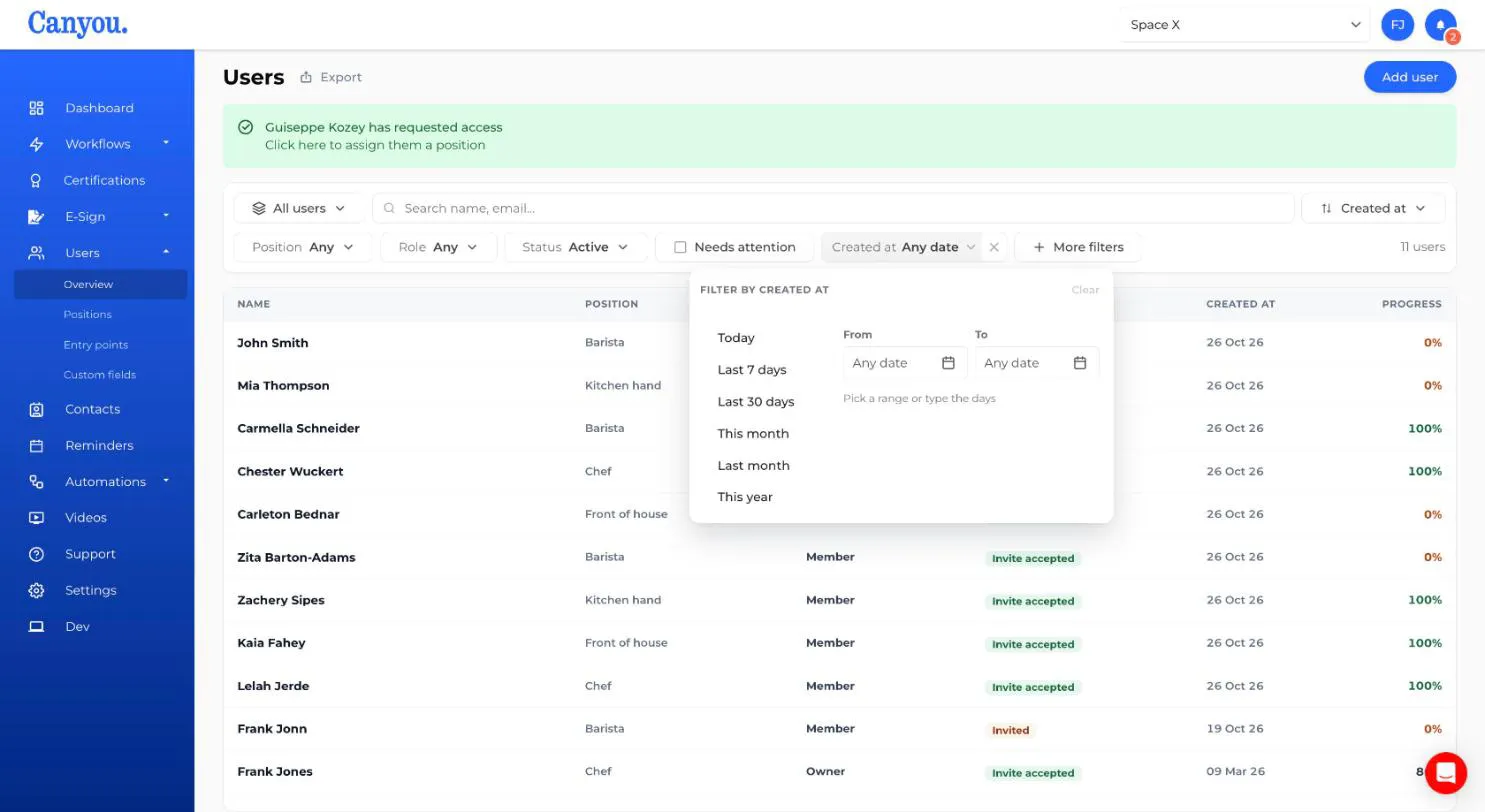
Note: Date ranges like Last 30 days keep moving. If you save a filter with Last 30 days, it always shows the last 30 days from today, not from the day you saved it.
Sort the list
The list is sorted by Created at, newest first, unless you change it. Click the sort button on the right of the search box to sort by Name, Position, Role, Status, Created at, Archived at or Birthday, and choose the direction.
To sort by more than one thing, click Add level. For example, sort by Position and then by Name, so users in the same position are listed A to Z. Click Reset to go back to the default.
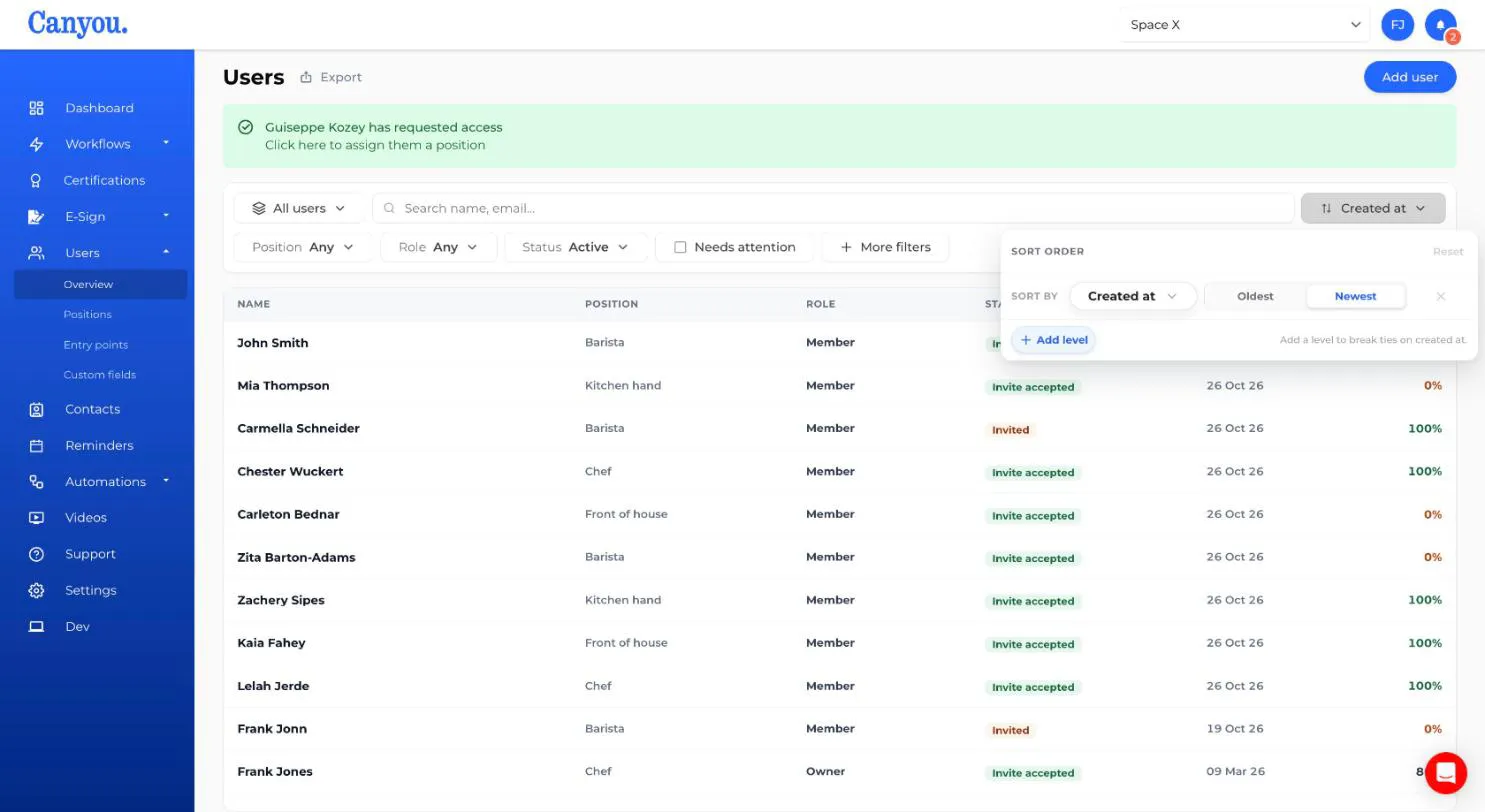
Save your current filters
- Apply whatever filters and sort order you want (role, status, position, etc). The search box is kept separate and is never saved.
- Open the saved filters menu and click Save current filters….
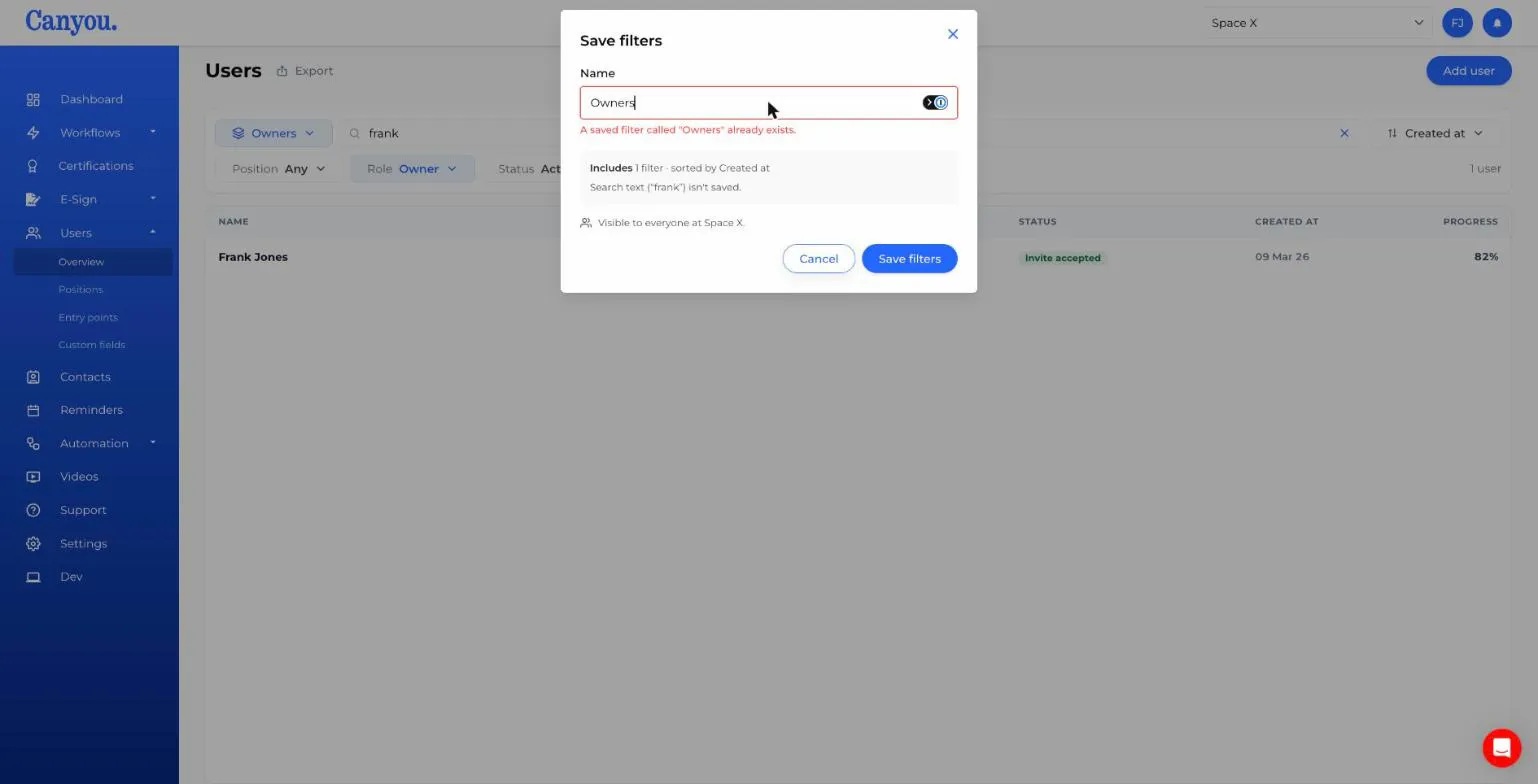
- Give it a name and click Save filters.
Note: Saved filters are visible to everyone in your business, not just you.
Switch between saved filters
Open the saved filters menu to see All users (the built-in, unfiltered view) pinned at the top, followed by your business's saved filters. Select one to apply its filters and sort order instantly.
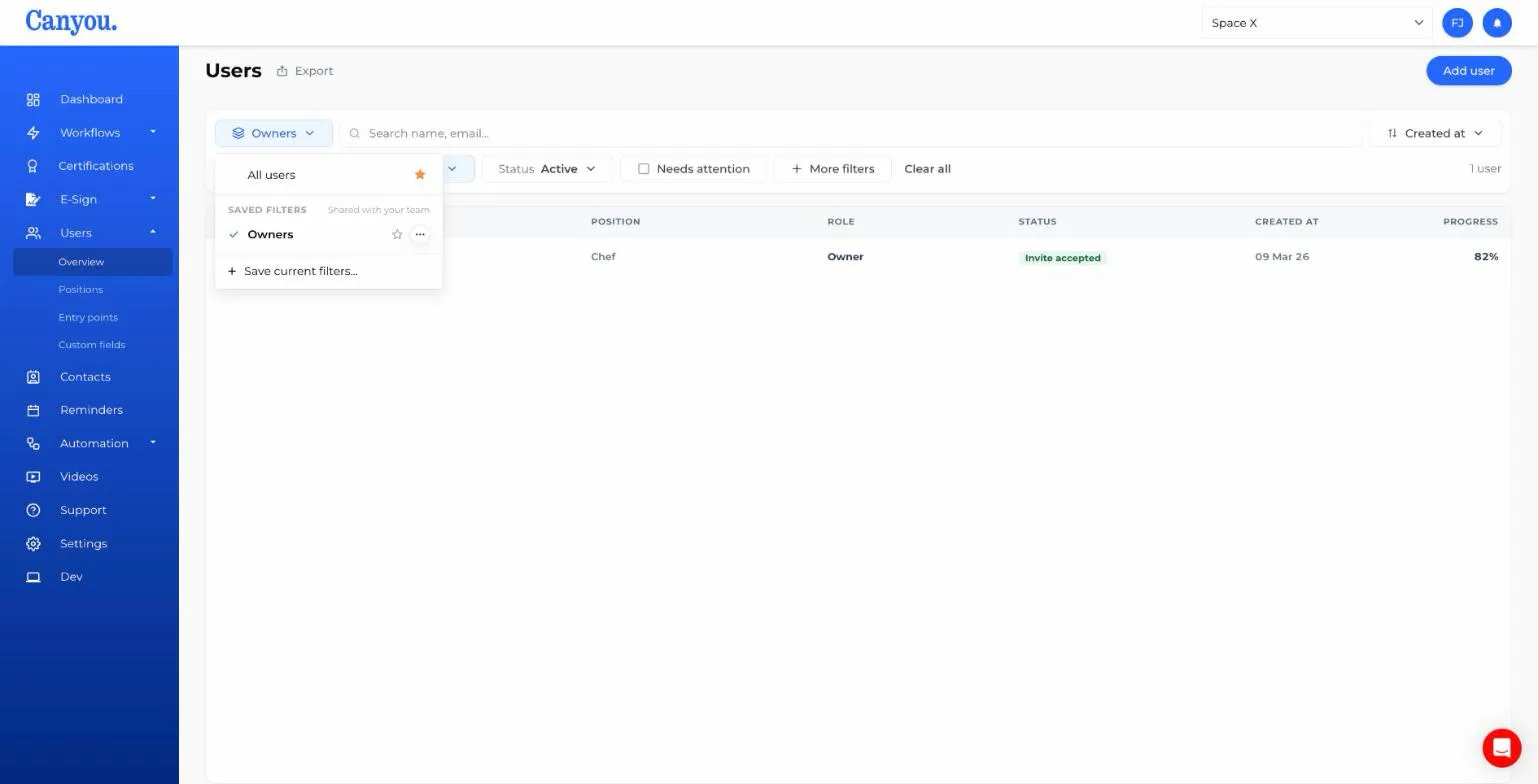
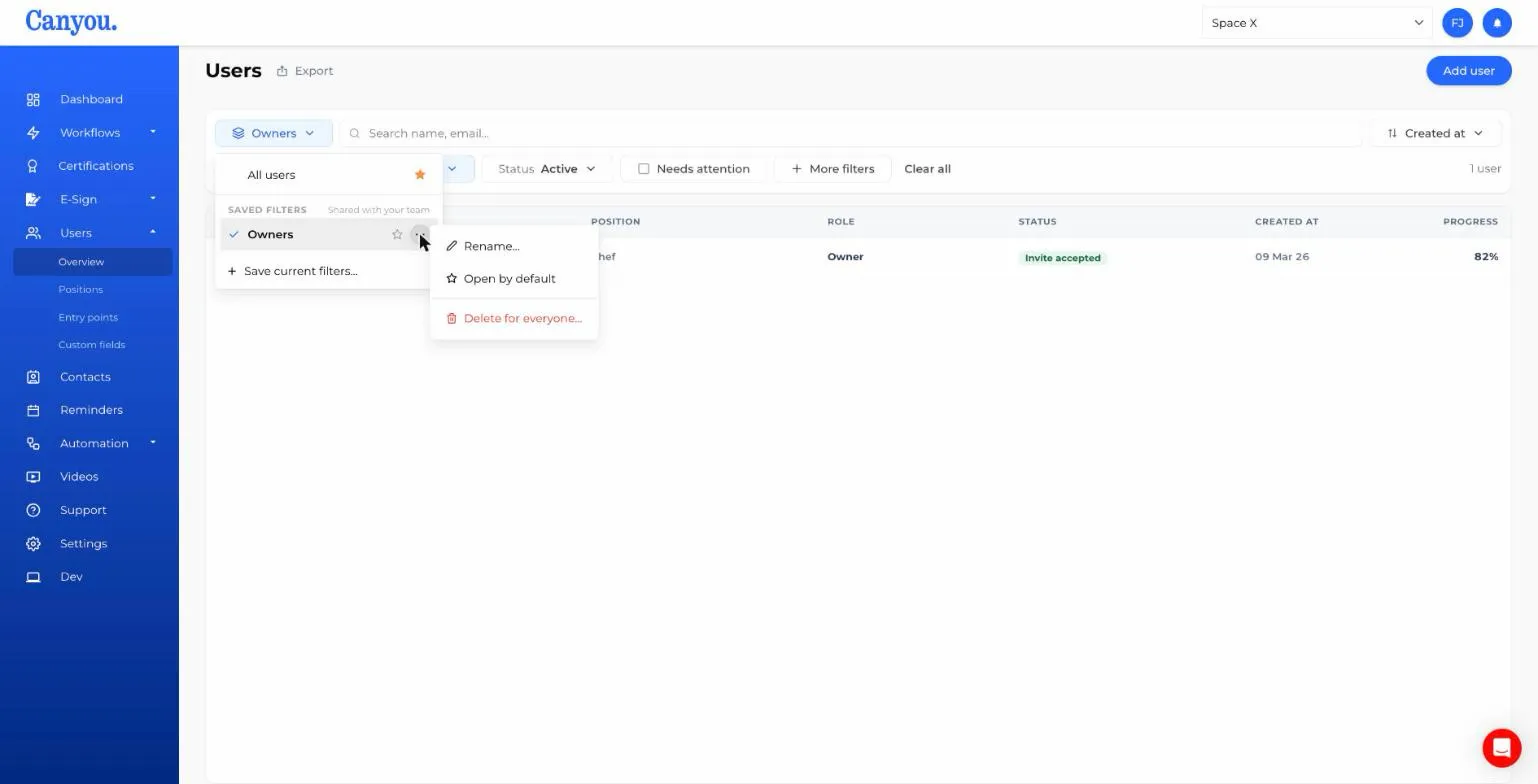
Hover over a saved filter to reveal two controls:
- The star - sets that filter (or All users) to open by default next time you visit the Users page, on this device only.
- The ⋯ menu - gives you Rename, Open by default, and Delete options for that saved filter.
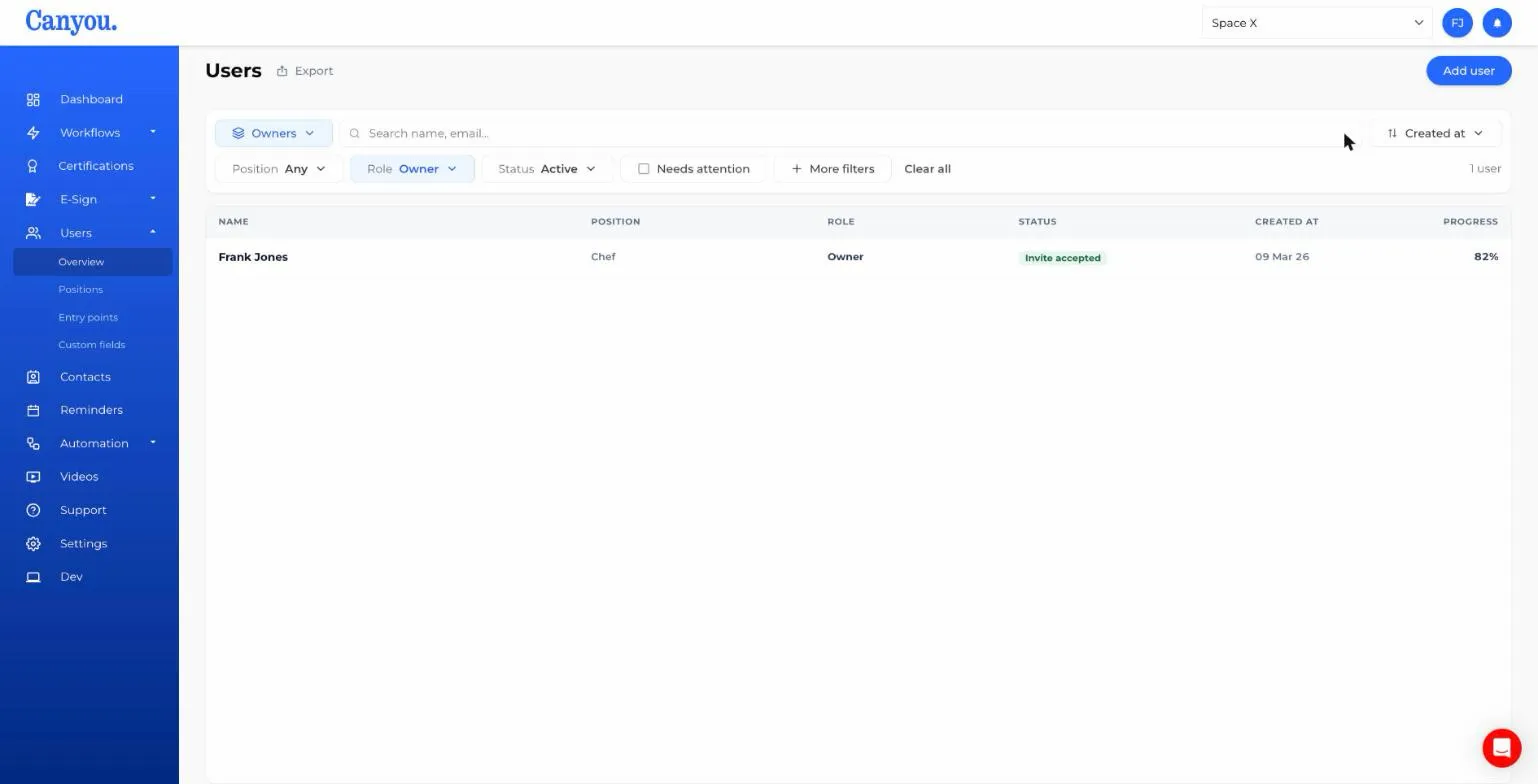
Once you pick a saved filter, the toolbar shows its name so you always know which one is active.
Editing a saved filter
If you change the filters or sort order while a saved filter is active, the toolbar shows an Edited badge, and opening the menu gives you the option to save or discard the change.
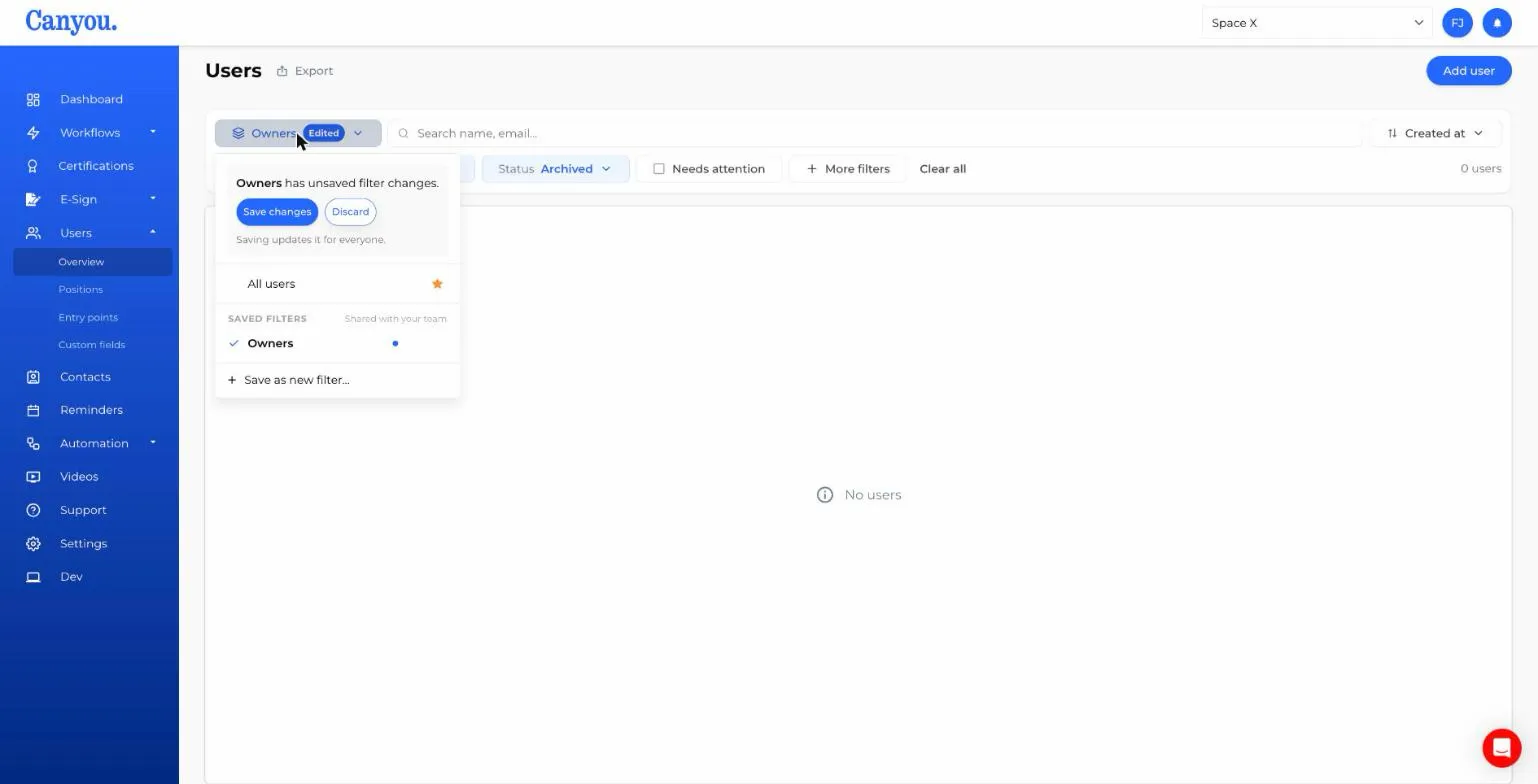
- Save changes updates the saved filter for everyone in the business.
- Discard reverts back to what's saved.
- Save as new filter… keeps the original untouched and creates a new one from your edits.
Deleting a saved filter
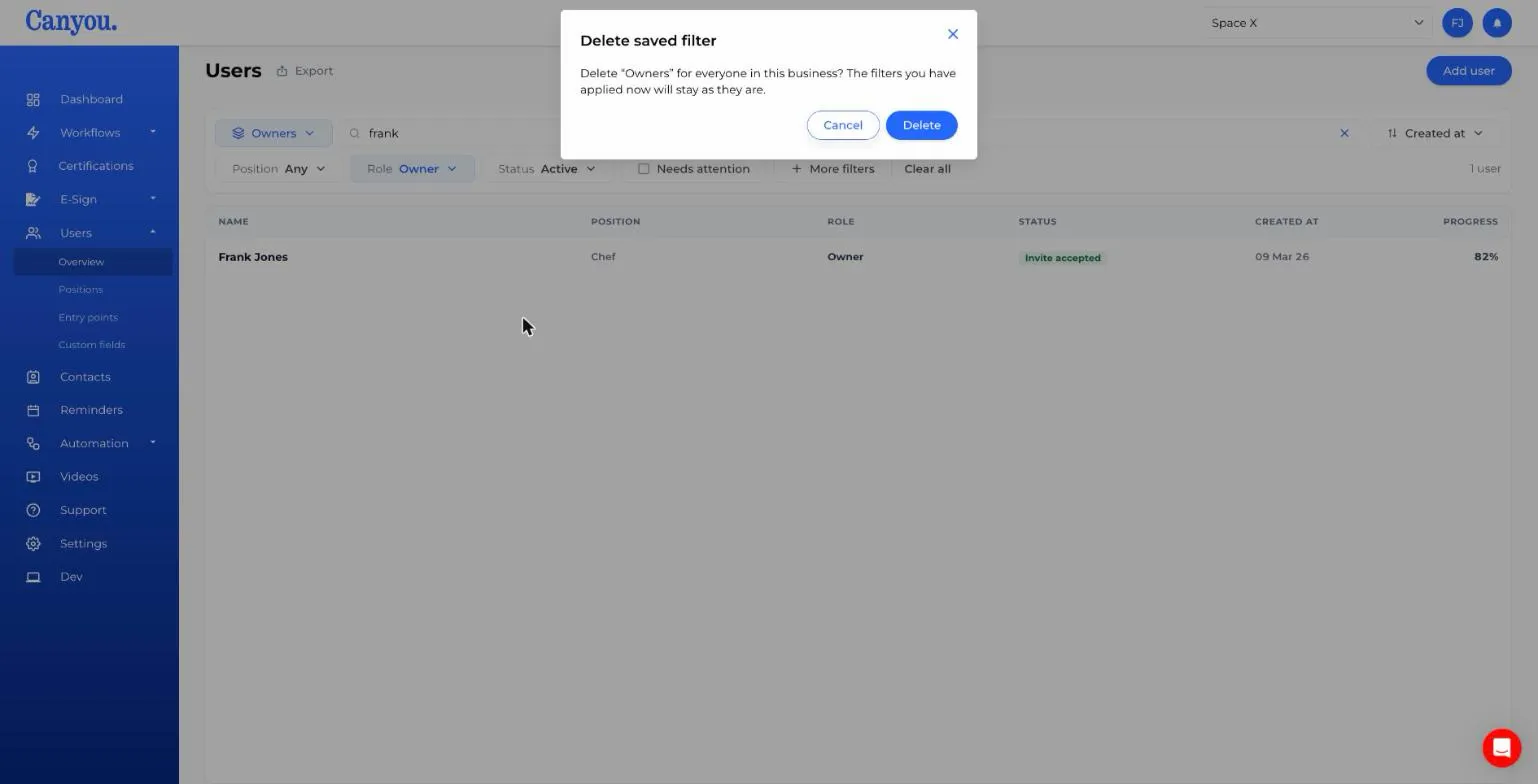
Open a saved filter's ⋯ menu and choose Delete for everyone…. You'll be asked to confirm. This removes it for the whole business, though any filters currently applied on your screen are unaffected.
NextExport users NextUser roles and basics